

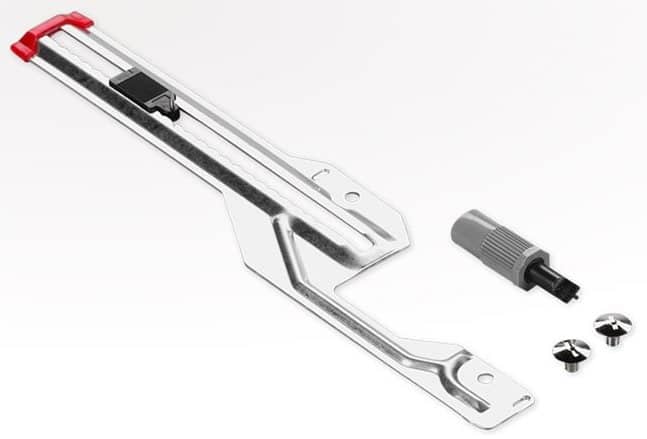
We are going in circles…using the Bernina Circular Embroidery Attachment #83. This attachment allows users to sew circles and semicircles using straight stitches, decorative stitches and other techniques like applique, couching or pintucks. Sew circles ranging from 3” to 10”.
Check out Sara’s video on how to master your Bernina Circular Embroidery Attachment here:
The Bernina Circular Embroidery Attachment will fit all newer models of Bernina sewing machines and most of the older Bernina sewing machines. Check with your Bernina dealer to be sure if you have a Bernina older than 30 years.
Since this is an “attachment” and not a foot, the foot selection can be changed based on the technique desired. For example, to couch yarn in a circle use the Bulky Overlock Foot #12C (I call this foot a couching/piping foot). Adjust the slide on the Circular Embroidery Attachment to the desired radius and sew!
It is recommended to always stabilize the base fabric well using 2-3 layers of stabilizer. Select the stabilizer based on the project fabric. For the project shown in the video I used a layer of sticky tear away stabilizer. Its stiffness helped keep the fabric flat and stable throughout the entire circle of circles.
It is best to use this attachment with the Bernina slide-on table, Sew Steady Table or a sewing cabinet. The support of these tables will keep the project flowing smoothly around.
Remove the rubber cap to expose the very sharp pin. Push the fabric down onto the pin and replace the rubber cap on the pin. This is not a pin you want to leave exposed! Did I mention it is sharp!
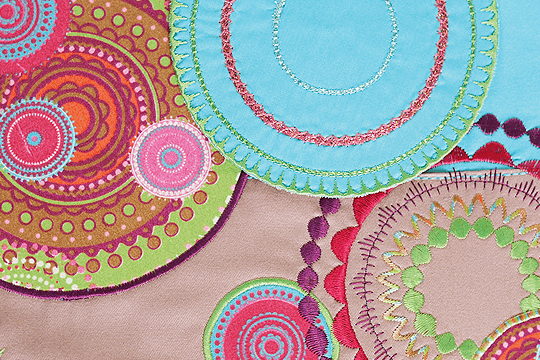
When using decorative stitches with the Bernina Circular Embroidery Attachment, with a watchful eye, you will be able to match the pattern up to the starting point. Use your fingers to tug or push the fabric as you approach the end of the circle. If the decorative stitch is coming up short, give it a little push. If the decorative stitch is sewing out a bit long, gently stifle the fabric to shorten up the decorative stitch.
One of my favorite functions to use the Bernina Circular Embroidery Attachment for is to make perfect machine appliqueable circles backed with woven fusible interfacing. Cut squares (not circles) of the fabric and woven interfacing. Place the woven interfacing with the fusible side next to the pretty side of the fabric. Pin the layers together with four pins. Set the Bernina Circular Embroidery Attachment to the size of the desired circle. Sew with a straight stitch. Remove the fabric and trim the circle using pinking shears close to the stitching line. Make a small slit in the interfacing to turn the circle right side out and then use your fingers to smoothen the edges.
I have found that sometimes I want to sew circles on something a bit too heavy. To keep the pin from moving while stitching, stabilize it with blue painters tape. Blue painters tape will not leave a residue on the sewing surface or the Bernina Circular Embroidery Attachment.
Did you know Bernina publishes a free eBooks on the Bernina Circular Embroidery Attachment? Click here to download the eBook.
If you love sewing circles and curves like I do, check out the following two online Craftsy classes:

Round out your quilting repertoire! Let Ann Petersen take the fear out of sewing curved seams and open up a new world of piecing.

Reach new quilting heights! Work alongside Cheryl Arkison as she shows you how to incorporate curved elements into your quilts with confidence.
Updated: February 2017